Automated call distribution
Overview
In the bustling world of call centers, where customer interactions are pivotal, an Automated Call Distribution (ACD) solution is designed to streamline operations and elevate customer engagement. Your ACD system seamlessly manages incoming calls, intelligently routes them, and ensures efficient call queueing, providing a foundation for exceptional customer service.
Distinguishing IVR from ACD
Interactive Voice Response (IVR) is a technology facilitating user interaction with an automated system before connecting them with an agent. IVR aids in identifying the nature of the user's query, directing them to the appropriate assistance.
IVRs achieve this by prompting users to press specific keys on their phones corresponding to their needs. For instance, an IVR might instruct, "Press 1 for product purchases." Subsequently, the ACD processes this input, linking users with relevant sales agents, and avoiding unnecessary transfers to unrelated departments.
In essence, IVR serves as a data collection tool, while ACD utilizes this information to organize and allocate calls. The synergy of IVR and ACD enhances both customer satisfaction and workforce engagement within the call center environment.
How ACD works
The ACD workflow is comprised of three distinct stages:
- Caller Identification: As previously highlighted, the initial phase involves gathering the caller's intent through an IVR interaction. Additionally, your IVR can be configured to let callers choose their language.
e.g. Callers will hear an IVR menu in English when they press 1, and callers need to press 2 to select an IVR menu in German.
This information empowers the ACD to match the caller with an agent well-suited to address their specific concern.
- Call Queueing: Following identification, the subsequent step involves organizing callers into a waiting list: when the number of incoming calls exceeds the number of available agents (customer service representatives) in a department, the incoming calls can be lined up in a call queue.
- Call Routing: The culmination of the process is call routing. Here, the ACD employs your chosen distribution strategy to direct calls. Should your aim be prompt customer service, the ACD can seamlessly connect the incoming call to an available agent.
Choose your path to optimal call distribution by selecting a corresponding ring strategy: your ACD system offers an array of distribution strategies to cater to your unique needs. Open menu "Cloud PBX > Ring groups" to select a ring group and click "Edit". On tab "General" enable the most suitable ring strategy.
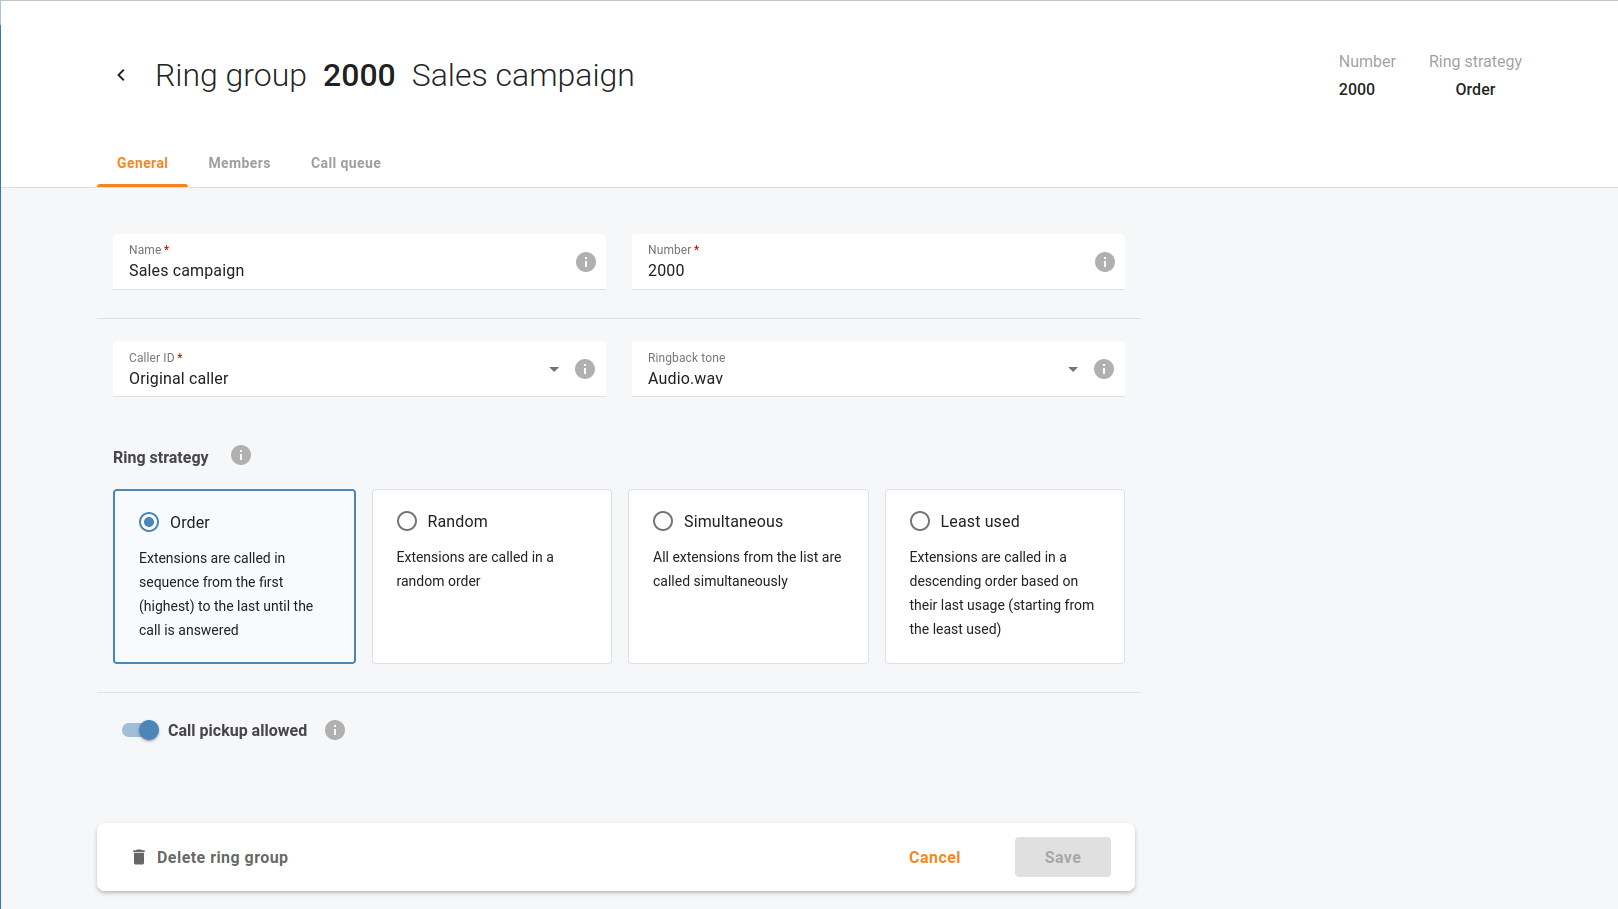
- If Order is chosen, extensions will be called one by one from the first (topmost) to the last number until the call is answered.
- Choose Random if you want to use a random order.
- Simultaneous enables simultaneous calls to every extension from the list.
- If you choose Least used, this sorts the phone lines in descending order beginning with their last usage, and delivers a call to their extensions, accordingly.
Call queues
If your organization receives a high volume of calls from clients, utilizing call queues ensures that every incoming call is managed effectively, allowing dedicated attention to each valued client.
Open menu "Cloud PBX > Ring groups" to select a ring group and click "Edit". On tab "Call queue" enable the call queue for the selected ring group, so when callers reach your organization and are transferred to some department, they are placed on hold and wait for an agent to become available and accept the call.

The call queue configuration allows you to set the following options:
- Interval between announcements – Define how often callers hear announcements about the number of callers ahead of them in the queue and the estimated wait time until someone attends to them. The default value is 5 minutes
- DTMF to confirm queue exit – Specify the DTMF code that callers should dial to exit the call queue and take a specific action, e.g. leave a voicemail (the action depends on the Take actions field). The default code is “0”.
- Timeout for caller input – Define the time period when callers can dial the DTMF code. The default period is 9 seconds after the announcement that suggests taking a specific action (the action is defined in the Take action fields).
- Dispatch calls to busy extensions – When this check box is selected, the calls from the call queue are directed to agents even when they are already on the phone.
There are 3 groups of settings that control the call-queue experience.
Placing into queue
When a customer calls your organization, all your agents may be busy. Configure how the busy call queue should handle new incoming calls in this case.
- Maximum calls to set on hold – The maximum number of calls that can be placed on hold within this queue.
- Upon reaching maximum calls on hold
- Play prompt – You can upload a file with a custom announcement so that it will be played (instead of the default announcement) for users when their call can’t be placed in the call queue because the maximum number of incoming calls has already been reached.
- Take action – Select the action taken automatically or upon confirmation when the maximum number of incoming calls is reached (for example, if the maximum number of calls set on hold is 100, and there is the 101st call). Possible actions include:
- Disconnect
- Redirect to extension
- Redirect to extension’s voicemail
- Redirect to another call queue
- Return to auto-attendant menu
- Wait for user confirmation – When this checkbox is selected, callers have to dial the DTMF code, e.g. “0” to take action (the code is specified within the DTMF to confirm queue exit option). By default, this option is disabled and the action (defined in the Take action field) will be taken automatically.
Waiting in queue
When a customer calls your organization, and all your agents are busy, this call is placed in the call queue, which means that a user has to wait until an agent becomes available. Configure how the busy call queue should handle new incoming calls in this case.
- Announce the number of callers ahead of them in the queue – When this check box is selected, callers hear an announcement stating the number of callers ahead of them in the queue.
- Announce estimated wait time – When this check box is selected, callers will hear an announcement about the estimated wait time.
- Play music on hold – Media file for a caller to hear instead of the standard ringback tone. The maximum allowed file size is 5 MB.
- Maximum waiting time – Define the time limit for the callers to wait in the call queue before they hear the announcement suggesting them to take a specific action, e.g. “Redirect to voicemail”.
- When waiting time passes
- Play prompt – You can upload a file with a custom announcement so that it will be played (instead of the default announcement) for callers waiting in the call queue.
- Take action – Select the action taken automatically or upon confirmation when the waiting time limit is reached. Possible actions include:
- None
- Redirect to extension
- Redirect to extension’s voicemail
- Redirect to another call queue
- Return to auto-attendant menu
- Wait for user confirmation – When this check box is selected, callers have to dial the DTMF code, e.g., “0” to take action (the code is specified within the DTMF to confirm queue exit option). By default, this option is disabled and the action (defined in the Take action field) will be taken automatically
Ringing operators
When a customer is first in the call queue, but no agent is picking up their call, this means that a user has to wait until an agent answers. Configure how the call queue should handle queued calls in this case.
- Maximum ringing time – Define the maximum period that the first caller in the queue (that is being connected with a specific agent) can wait until the agent picks the call up.
- When ringing time passes
- Play prompt – You can upload a file with a custom announcement so that it will be played (instead of the default announcement) for callers waiting to be connected with an agent.
- Take action – Select the action taken automatically or upon confirmation when the waiting time limit is reached. Possible actions include:
- None
- Redirect to extension
- Redirect to extension’s voicemail
- Redirect to another call queue
- Return to auto-attendant menu
- Wait for user confirmation – When this check box is selected, callers have to dial the DTMF code, e.g., “0” to take action (the code is specified within the DTMF to confirm queue exit option). By default, this option is disabled and the action (defined in the Take action field) will be taken automatically